[Do you like this? Please subscribe to my YouTube Channel and then share it for me!]
Video Summary
In case you’re not aware, a Google Business Profile is free from Google, and it helps you maintain your business in local search results. It’s important to have a complete profile so local searchers can easily find your business.
A properly configured profile helps your business show up in that part of the search results that I like to call the Money Zone. That’s the section of the search results that shows a map and up to three businesses.
In this video I’m going to show you how to optimize your Google Business Profile…
Video Transcript
Hello, my name is Jeffrey Kirk.
Are you using your Google Business Profile?
In case you’re not aware, this profile is free from Google, and it helps you maintain your business in local search results. It’s important to have a complete profile so local searchers can easily find your business.
A properly configured profile helps your business show up in that part of the search results that I like to call the Money Zone. That’s the section of the search results that shows a map and up to three businesses. I call it the Money Zone because it’s so prominent in the search results, and the businesses showing up there are easily seen.
It’s the best part of the search results for any business because searchers get access to your website, your phone number, and if they’re on their mobile phone, even GPS navigation. And it’s all in one place. And having a profile is what qualifies your business to get reviews.
In this video I’m going to show you how to optimize your Google Business Profile.
Optimize Your Google Business Profile
By optimizing your profile, you are able to differentiate your business from others and show up more often for searchers.
Optimizing your profile is especially important if Google created your profile based on information it found about your business. In that case you might even have to correct some inaccuracies. So, at a minimum, you ought to edit your profile to make sure the information Google shows to searchers is accurate information.
Before you can edit or optimize your Google Business Profile, you must claim the profile. And if you need help with this, see my video about the claiming process. Once you’ve claimed your Google Business Profile and have access to edit it, it’s important to provide all the information that Google asks for. You don’t have to do this all at once though. Keep in mind that you can return to your Google Business Profile at any time.
The easiest way to get to your profile is to simply go to Google and do a search for your business by name. Assuming you are logged into your Google account, and your account is an owner or manager of the profile, then you get access to the profile settings right in the search results.
If you manage your business at several locations, or you manage more than one business, you can also get access to all of them at once by first going to google.com/business and then select the one you wish to manage.
You’ll know you’re in the right place to manage if you see the “Your business on Google” section at the top of the search results. It will look something like this.

You’ll be able to edit your profile by clicking on the various icons shown. If you have never done any updates to your profile before, you might want to start with the larger button that says, “Complete your profile”. This will walk you through the various incomplete areas of your profile.
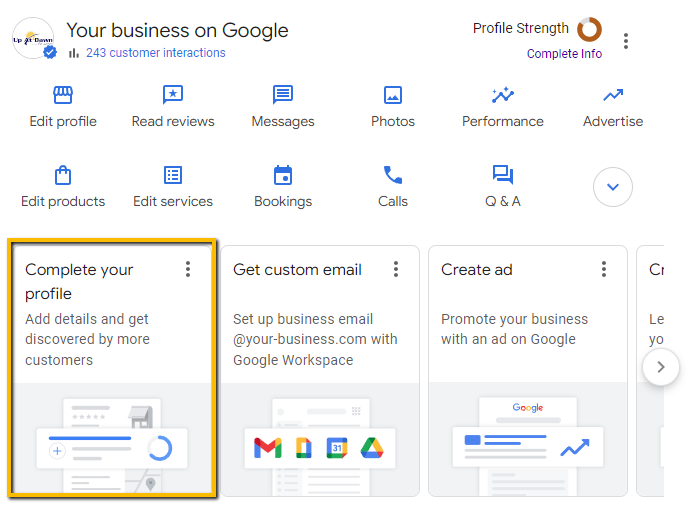
For this video though, I’m going to show you how to edit each important element of your profile without going through the “Complete your profile” process.
Complete Your Profile
It’s important you know how to do this because this method gives you direct access to everything whether you previously completed it or not. To get started, click on the “Edit profile” icon.
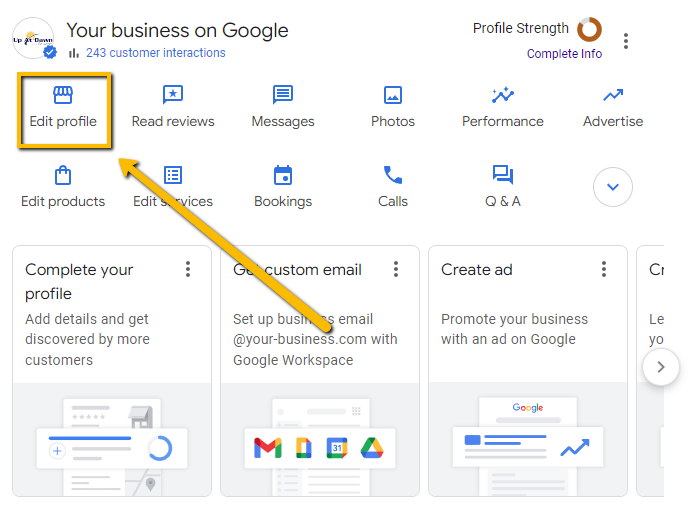
After you click, the “Business information” window will pop up. It looks like this and you can scroll down to access a lot of different information sections.

You can also quickly jump to different sections in the window by using the About, Contact, Location, Hours, and More links at the top of the window. Any sections that have been edited in the past will be filled in. If a section has no information, it will show up with the word “Add” like this.
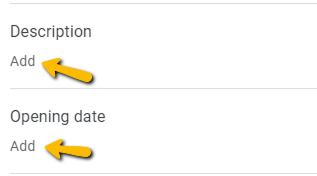
Your goal in optimizing is to make sure you fill in as many sections as possible and verify that information is accurate.
Add Business Name
Now I’m going to go to my computer to show you a few more things. Okay, so I clicked on the edit profile button and now I am looking at the business information window. So the first thing to do is check your business name. It shows up right here at the top.
So you’d move your mouse to here, and if you need to make changes, click on the little pencil icon. This opens up the editor, and then you can type in here and make any changes if necessary.
Now remember, this should always be filled in with your real world business name. The same one you use on signs and business cards, your city name search keywords. They don’t belong in this field unless they’re always part of your business name. You’ll see other businesses do this incorrectly, but they’re doing it wrong and they could be penalized for it.
Add Business Category
Always follow Google’s rules for the best long-term results. Then if you’ve made any changes, click on save. Otherwise, I didn’t make any changes, so I’m going to click on cancel. Next is the business category. So the choice you make here influences your business ranking in the local search results.
You need to choose wisely, and I’m going to click the pencil to edit. Again, you get a primary category, just one, and this should tell Google as close as possible what your business is, whatever category is here is the one that gets displayed to the public. So you want your most important category in this spot. And then you can add additional categories.
You just click, and you can choose additional categories here if there are any other ones that are good for your business. You can use as many as possible as long as they truly relate to your business, but you can’t define your own categories. And you have to pick from a list that Google provides.
I have internet marketing service. Let’s say I wanted to do search engine optimization. I’d just start typing search engine and the closest thing is research engineer. That doesn’t apply, so that doesn’t work. I could choose some other marketing category, perhaps. Marketing agency, marketing consultant, internet marketing service. That’s what I already have. Detailing. These are kind of related to what I’ve typed, like water skiing club that’s related to marketing, right?
So anyway, you just have to try and see what comes up. For some businesses, this restriction is going to be pretty difficult, so you look for the closest category you can find, and if you can’t find any additional categories, don’t worry about it.
Just try to get the primary as close as possible. And if you’re not sure, do a search for some of your competitors and see what categories they’ve already chosen because you’ll know that those exist. And then you can start here. When you’re finished, again, you’d click save, cancel if you made no changes.
Add Business Description
Next, for good optimization, you have to have a good business description. In this section, you get up to 750 characters to describe your business. You should describe what you offer, what sets you apart, your business history or anything that you think would be helpful for your customers to know. The idea is to focus on the details of your business, not on promotions or prices or sales. You should not include links, but you do want to include a call to action.
You want to get someone to take the next step. Many businesses do not have a good description, so take advantage of this space. What you put here can persuade a searcher to click or call. It can help you get more business. Next is the opening date for your business.
What was the date your business was first open at this address setting? This is optional, but if you come in here, you’ll see that the year and the month have an asterisk. That means they’re required like it says. So if you put in a date, you do have to add the month and the year. You can add a date, but that’s not required. If you leave it blank, that’s also acceptable.
Add Contact Number
The next thing, and this is also really important, make sure your phone number is correct, and it’s like the category field in that you can add more than one phone number. The first one, the primary number. This is the one that gets displayed to the public though, so use the number here that you want people to call. And if your business uses several different phone numbers, then you’d click here to add more phone numbers.
This way, if Google ever finds another phone number like they’re out on a website or an ad or something and there’s another phone number associated with your address, Google will know that it belongs to your business.
Otherwise, without it being listed here, Google might try to create a new profile that later conflicts with your existing profile, and that ends up being a duplicate, and that can create some problems.
So it’s best to put in any phone number that’s publicly available. Just create a list. Like I say, these aren’t visible to the public here. It just helps Google. And then again, save if necessary. Next up is your website address and like your phone number. This one is critically important.
Add Website URL
Now I want to start out by saying that you do not have to have a website in order to get a Google business profile, but if you do have a website, you want it listed here. If you include a website, Google is going to include the link on your public profile, and that can drive a lot of traffic to your website. So enter the primary URL for your website. For most businesses, it’s the homepage address that’s going to work best.
But keep in mind, if you have multiple locations in different communities, each location can have its own Google business profile. And in that case, each location can also use the URL of the location page of the website. If you have location pages also as shown here, you can also add tracking codes to the URL if you want to track clicks from the business profile to your website.
Add Social Profile
And again, all you do is you click the pencil to add it, make any changes, and then click save. Next we have the social profile section, and this is the newest edition to the Google business profile. And fact, Google even labels it with new at this point, you can see I don’t have any added here, everything up to this point I’ve already taken care of.
So this one works a little bit different, although you start with the pencil like everything else, and then you will choose your social profile. Whichever one you want to include, you would just click on it and then add the website address off to the right.
I’m going to add my profiles and then I’m going to continue on. So one note, when you add YouTube for the web address, you need to use the one that contains your handle.
So I will show you that. Let me just grab it over here. So it’s the one that has @JeffKirk. If you have a YouTube channel, use the one that includes the at symbol and then the link will be able to work for you.
Okay, I’ve got these all filled in and then I click save. Next. If you have an older profile, you’re going to have this section called short name. If you don’t have this, don’t worry about it. In fact, the only action I can take here is to delete it. There’s no way to edit, change it, do anything at this point because Google has faced it out. Next is your business location. And this is a big one too.
Add Business Location
For best results, it’s a good idea to let your customers see your business location on Google by adding a street address. And you would click and you’d come in here and you can put your address, city, state, zip. If you’re in a different country, you’d have different information.
If you don’t want to show your address, you would make sure that’s turned off. And then you would focus on service areas. And that’s nice that Google deleted my address by flipping that on and off. So I’m going to cancel and come back in because I want to keep my address in here.
The thing about the address is if you have one, then you get the pin on the map, and that helps people when they search for what you do in your local area. So if you’re closer to where they are, that makes your business easier to find and it makes it more likely that your business is going to show up.
If you have a suite or office number, that should go in the second line of your address. So you’d click here to add an address line. And current best practices suggest that using the number sign instead of the word suite is preferred. But ultimately this is for customer experience. Since Google is going to ignore the suite number anyway, their main concern is the street address. The other thing to confirm is that the map pin is pointing in the right place.
Just because you’ve got your street address there doesn’t mean Google gets the map, right? So if it’s wrong, you want to click this adjust button and then you don’t move the pin, you move the map so you can zoom in and adjust, get everything exactly right and then you’d click done.
And I don’t want any changes here, so I’ll click cancel. So next up you specify the service areas. It’s in this section where you can indicate the geographic region where your business provides service.
Specify Service Areas
If your business does not have a storefront with clear signage, but instead you travel to your customers at their location, then yours would be considered a service area business. And in this case, you should clear out the physical address in the business location. But whether your business has a location or not, you should fill out service areas.
Where do your customers come from or where do you go to meet them? Those are what you want to consider for this.
In most cases, a service area should not exceed a two hour drive. That’s the recommendation. But in many cases, this is far too large an area, and for some businesses, a larger area would be appropriate. The size of your service area really depends on the nature of your business, the population density and competing businesses in the area.
And I know for some businesses it might be tempting to say all the entire United States or the entire world or something like that, but keep in mind that the bigger the area, the more diluted your presence is.
If you can be in a very small tight area, odds of you showing up in that area is much better. Because if you’re located like I am in Waukesha, Wisconsin, even if I chose the entire United States, my business is never going to show up very far outside of this area. So I might as well focus. So when you’re in here, it says search area, and this is where you can just start typing.
For example, let’s say I wanted to type Milwaukee, Wisconsin. I could just click that and the city would be added. Likewise, it’s already suggesting service areas of Waukesha. So I can add that in the search area. You can specify city, county, state, zip code, country, whatever area is going to make the most sense for your business.
And you can add more areas to completely cover your service area. But keep in mind, there is a limit of 20 service areas per business listing. So if you have more than 20, then consolidate them into larger areas.
For example, instead of a long list of cities, you can specify a single county, which is why I started here with Waukesha County and Milwaukee County. That’s the area that I am best to service in a location-based setting. Keeping Waukesha as a city though, since that’s the base is good.
I’m going to leave Milwaukee out for now, but I will save this. And since I made a change here, the edit is pending, so Google has to review it, and usually that’s done automatically.
They’ll pretty much confirm that Waukesha, Wisconsin is within Waukesha County. So I was already servicing that area and it’ll all be good, but this way you get to see that edits don’t just happen magically and instantly. And mine is a situation where I can serve people all over the country, all over the world. But you see, I zoomed it in to where I’m locally based.
The other thing to keep in mind is if you have more than one physical business location, each location can have its own Google business profile, and each profile can have its own service areas. So you’d want to split up the list based on where your individual locations are situated.
Add Business Hours
Next, we come down to business hours, and you should have your regular business hours listed so clients know when you’re actually available and Google will dynamically change the status of your listing based on the time of the search.
In other words, searches outside your normal hours will show your business as closed. Likewise, you can use the special hours down here for holidays or other dates that might have unusual hours. So let me show you this in hours, if I click, it says open with main hours open, no main hours. So this would turn the hours off if you chose that.
You can also use this to temporarily or permanently close your business. But if you’re choosing hours each day, you can mark as closed, in which case no hours will show. And for any day that’s not closed, then you can enter the open and closing times. And for special hours you would add a date.
What day is it and when do you open and close for that day? Or are you closed completely?
Another reason why you might not want to leave your hours as closed is if you operate by appointment only or your hours vary frequently, then it doesn’t make sense to regularly list them because you’ll always be in here changing them. And then if you have special hours for any of a variety of different things, you can include them as well.
For example, let’s say in my business I offered a happy hour. I could say, oh, yep, we only do this on Wednesdays, and whatever time that is. So you can choose from this list for those special things.
Add More Details
And the last section here is titled more, and you’ll probably see a list of attributes. You may not see the exact same ones I’m seeing here, and if you do see them though, you can select them for your business.
So for example, from the business, how does the business identify accessibility? What kind of accessibility do we have? Those kinds of things. Amenities, and what you see in any of these sections is going to vary depending on what Google determines to be the potential attributes for your business. So be sure to go through each of these sections and if it applies, great, choose it. If it does not, it’s all right to ignore it.
Okay, now that we’ve gotten to the bottom of the business information, let’s look at three more areas of your profile… Photos, Edit products, and Edit services.
Add Photos
Let’s start with Photos by clicking the Photos button.
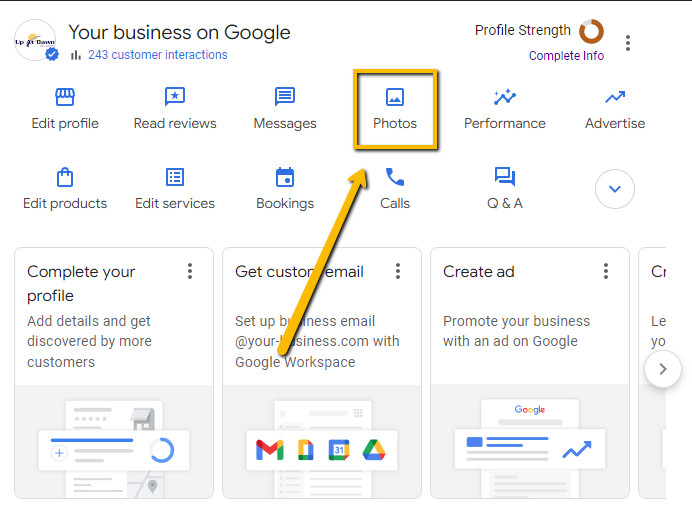
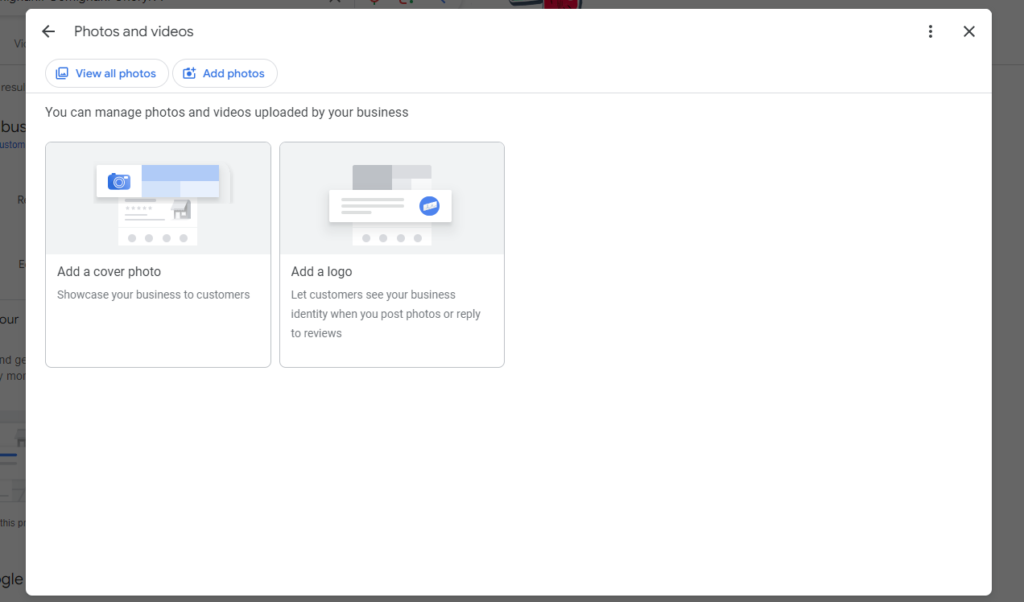
Once you click, you might see something like this if you have not added any photos in the past. In this case, click the left box to “Add a cover photo” and then click the right box to “Add your logo” image.
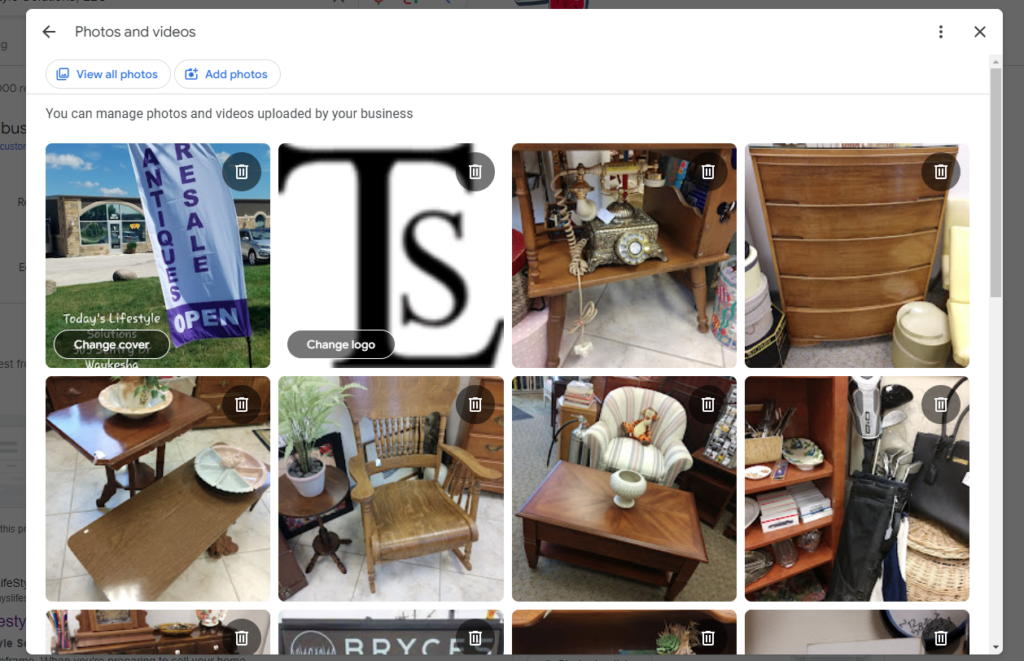
If you have added photos in the past, the screen might look more like this one showing all your previous photos. You’ll also see with the first two images that you can click to change cover and change logo.
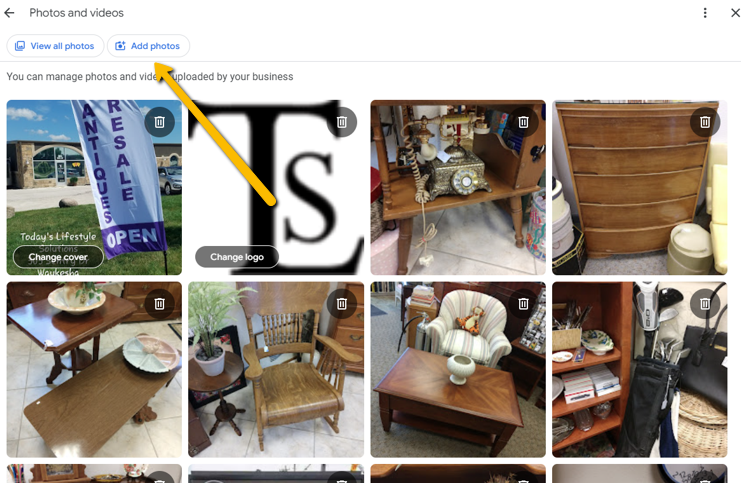
To add more photos, click the Add photos button at the top.
When you do that, you’ll see a window that looks like this one. You can drag and drop photos or videos. You can click the blue text to select photos or videos from your computer. At a minimum, be sure to add your logo so Google will display it as part of your business listing. But adding more is better.

According to Google, “Your listing is a great place to showcase the photos that capture your business. Businesses with photos receive 42% more requests for driving directions to their location from users on Google, and 35% more clicks through to their websites than businesses that don’t have photos.”
To me, these seem like really good reasons to include photos and videos with your profile listing!
Edit Products
When you’re finished uploading photos or videos, move on to Edit products. Not all types of businesses will be able to add products, but if you do offer products, it’s a good idea to take advantage of the opportunity.
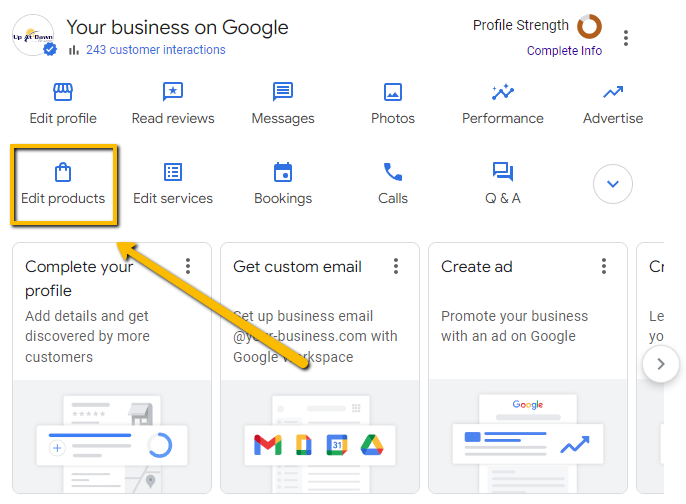
If you have never added products before, you’ll see a page where google asks you to Get started. If you have added products in the past, you’ll see your previous products along with an Add product button.
Whether you click the Get started button or the Add product button, you’ll see a window where you can add your product information.

You can add a product name, select a category or create a new product category, include a price if you want, add a product description, include an image, and you can also add a link to the product page on your website.

Click the Publish button when your product is ready. Repeat as needed for additional products. The next section is services.
Add Services
If you see the button and have services to add, take advantage of this section…
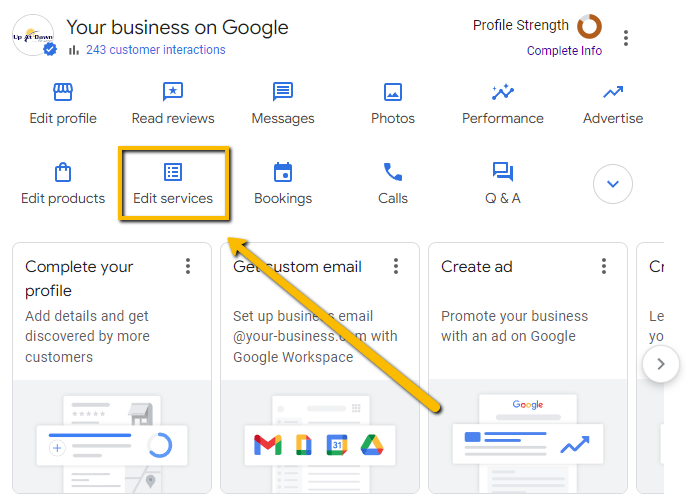
Initially, when you click, the primary category will match the category you entered in the Business Category section of your profile. If Google already understands your business, they may present you with a list of potential services. If there’s a match, just click it. Choose as many as make sense.

Whether Google gives you ideas or not, you can also click the “Add custom service” link as many times as you need to. You can define your own services with each one being up to 120 characters.
There’s also a second type of services listing. If this shows up for you, you get the ability to enter more information about each service, including a service description along with price. Well that’s it. Did I already say that the more you fill in the better? Businesses that have complete profiles have an advantage, so take some time to be as complete as possible.

And look in the upper right of your profile to see your profile strength. The more complete your profile, the better. Ideally, you want the circle to be closed and colored green.
Congratulations, you now have an optimized Google Business Profile!
Want to take your profile to the next level and use it to overcome competitors in your market? By claiming and optimizing your listing, you already have two-thirds completed.
There’s just one step left, but that’s where most businesses fail. If you run a great business, and your customers or clients love what you do, and you have at least one competitor in your market, then you probably want your business to show up in the Money Zone as much as possible.
I have a webinar which shows you exactly how to do this. If you have not been to the webinar, then look for the link and join me soon.
Your business deserves to be seen online, and I will help you get there.
Thanks for watching and have a great day!